Introduction
The MagMod system is, to quote the company site, “the simplest, easiest, strongest, fastest, and sexiest speedlite modifier system, period.” The silicone rubber construction and magnetic connection innovation together make this the easiest, most reliable way to use gels and grid spots on my flashes. Since I already had the Basic Kit, it was an easy decision to use some of this year’s income tax refund money to buy the newly released MagSnoot.When it comes to the snoot, I do have some basis for comparison. I got the LumiQuest Snoot XTR in 2011, and in 2014, I made my own snoot out of a cereal box. The DIY snoot is perfect for home use, but is bulky and fragile for traveling. The LumiQuest model folds flat and seems durable, but has light leaks and is tough to attach to the flash. The MagMod MagSnoot beats both: it collapses for storage/transport and is incredibly tough, snaps easily to the MagGrip via magnets, and even has a built-in MagGel holder.
Why?

Using MagGrid and MagGels on two of the three flashes that light this image
My justification for buying the MagMod basic kit was that I wanted to make more images like the one above, where I can more completely control the light, including its color. The kit has definitely helped with that.
The addition of the snoot just made sense: I use snoots on occasion, but they’re flimsy and otherwise imperfect. The MagSnoot solved those issues.
Worst Things First
• Ships Via USPS
As with the basic kit, I was disappointed that there were no options listed for shipping when I ordered. It turns out that MagMod ships through USPS (U.S. Postal Service), with which I’ve always had difficulties — compared to UPS or FedEx, though I’m sure it’s slightly cheaper. My shipping fee for the MagSnoot was $5.In The Box

Minimalistic packaging of the MagSnoot
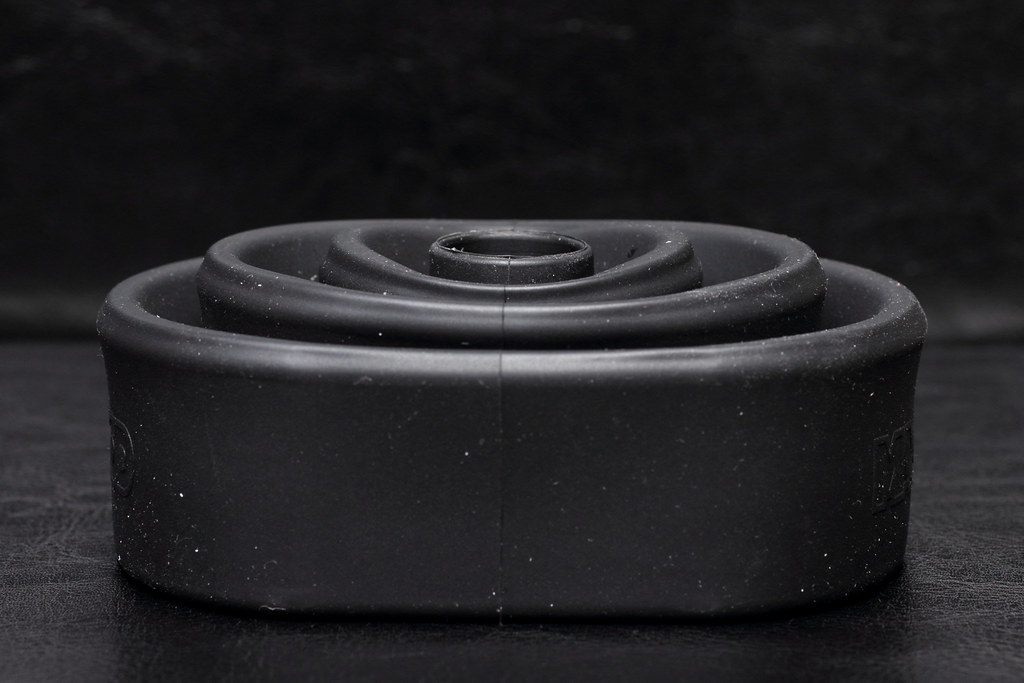
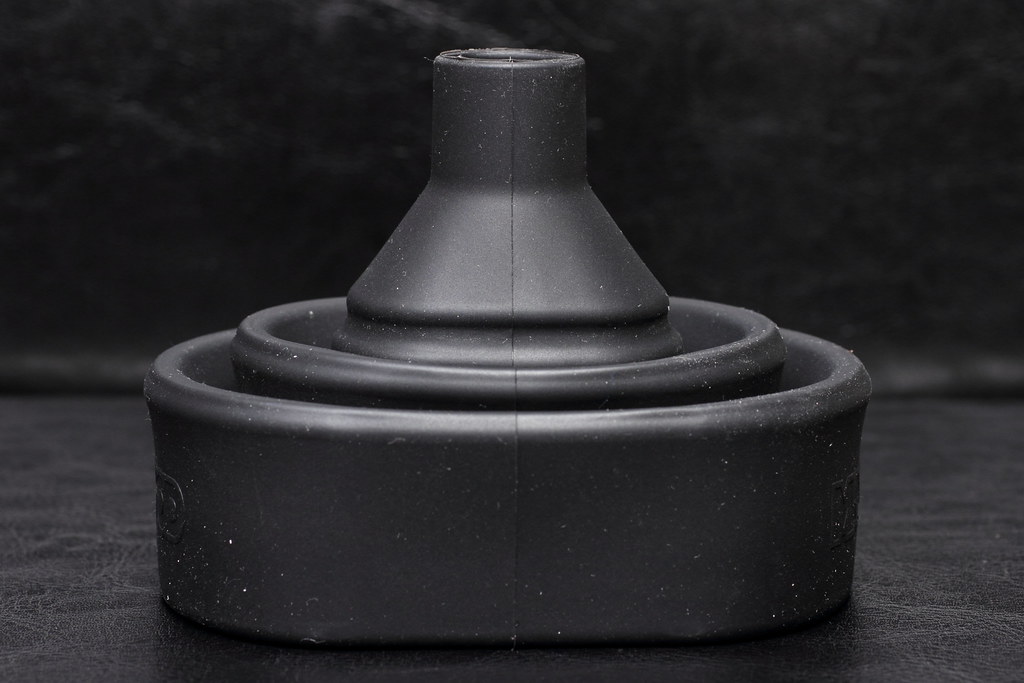
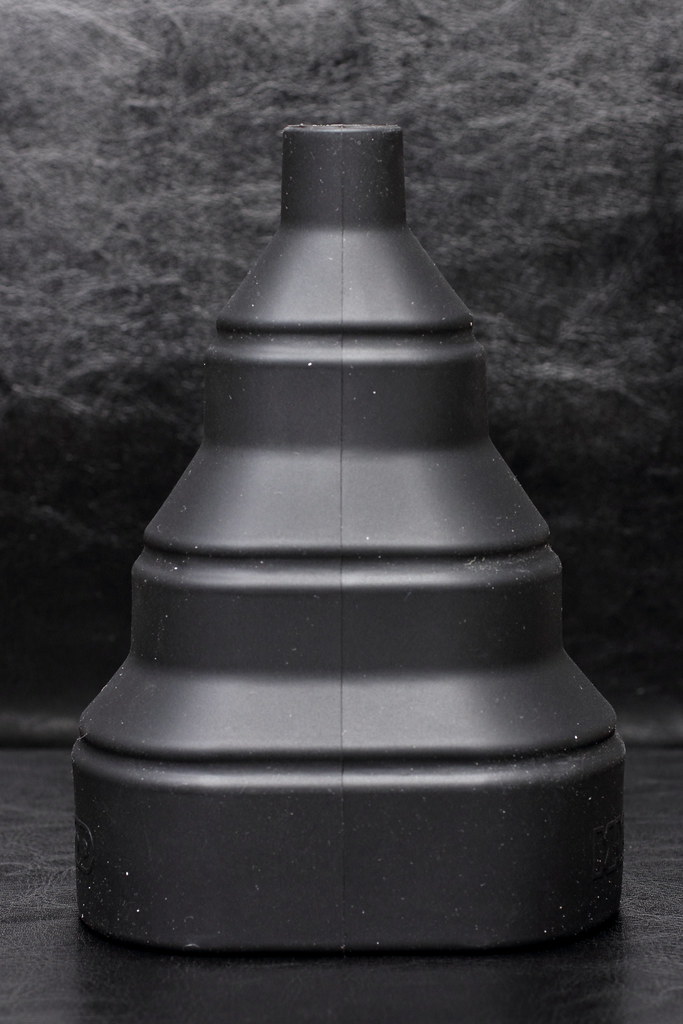
Inside the beautiful, minimalistic box was just the silicone rubber MagSnoot, collapsed.
Four positions are possible, as seen in the images below:
 larger |
 larger |
 larger |
 larger |
How It Works

MagGrip on a LumoPro LP180
As for the built-in gel slot, it’s in back and as easy to use as the MagGel holders I already owned. The rigid gels simply slide in.
Build, Quality & Size
All the MagMod products are built solidly. As always, durability is something that can only be tested with time, but the MagSnoot feels just as durable as the other products from the same company. I’ve had the basic kit for more than six months now, using some of the pieces daily.Sample Photos
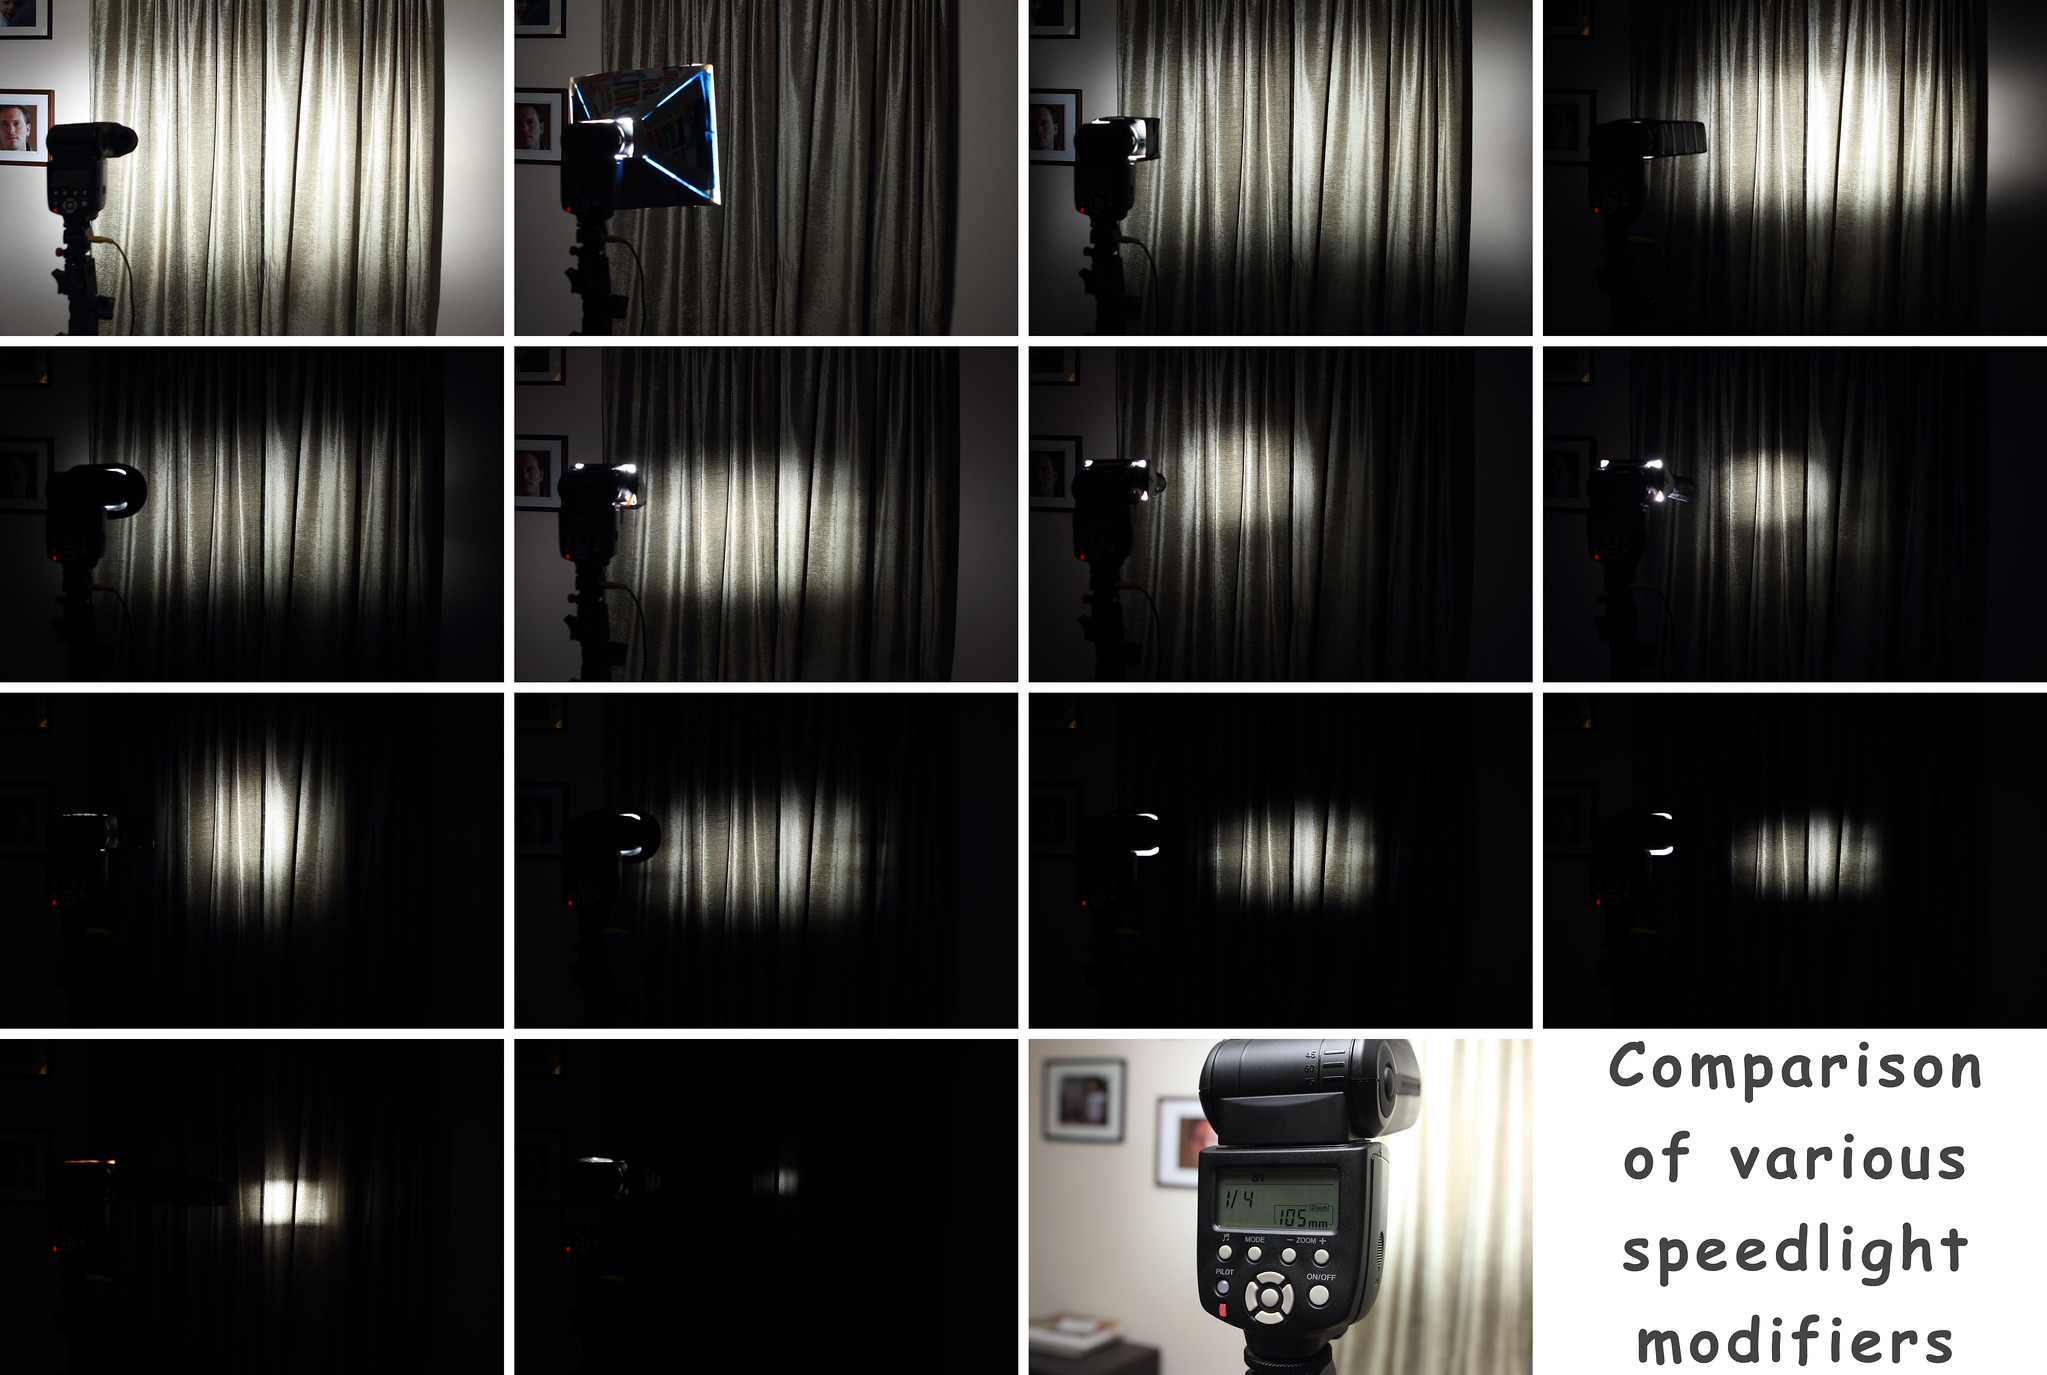
The image below includes 10 photos comparing various light modifiers I own, including the MagSnoot at all four positions, and a few of my DIY snoots. In all cases, the speedlight (Yongnuo YN560-II) used the same settings (1/4 power, 105mm zoom) and was 4.5 feet from the curtains, while the camera was set at ISO100, f/6.3, 1/200 sec., with a 28mm lens.The configurations were as follows:
- First row, from left: (1) bare speedlight, (2) DIY mini-softbox, (3) DIY light restrictor, and (4) DIY cardboard snoot.
- Second row: (1) MagSnoot, flat, (2) LumiQuest Snoot XTR, (3) LumiQuest Snoot XTR, extended, and (4) LumiQuest Snoot XTR, fully extended.
- Third row: (1) DIY grid spot, with straws, (2) MagSnoot extended one section, (3) MagSnoot extended two sections, and (4) MagSnoot fully extended.
- Fourth row: (1) DIY long cardboard snoot, and (2) another DIY snoot.


My daughter and my son, each lit from behind by a MagSnoot-modified flash holding a light green MagGel
Conclusion
If you don’t need a snoot, there’s no reason to buy a MagSnoot. The same would be true if you already have a snoot that works for you. But if you want a snoot, this is a good one to get (remember it requires the MagGrip to be useful).I was happy with my homemade snoot, but the MagSnoot will be better for having in my camera bag when I travel. In the past, the cost ($45) would have been prohibitive to me, but this time I had a little money to spend, and I’m thankful for that.
comments powered by Disqus